(Please welcome guest blogger Liz Dube, Conservator for the University of Notre Dame Libraries. She kindly agreed to write up some impressions from the workshop and share some images. Jeff)
I ventured to New York City in April to take part in a rare and enlightening reenactment of 18th c. French bookbinding. During this four-day workshop organized by the New York Chapter of the Guild of Book Workers, our group of about a dozen bookbinders tucked ourselves away in the Conservation Lab of the New York Academy of Medicine and under the direction of Jeff Peachey, determined to bind books in the style of 18th c. France.
The effort was informed by two contemporaneous bookbinding manuals: Traite de la Relieure des Livres (1762/63) by Jean-Vincent Capronnier Gauffecort and L’art du Relieur de Livres (1772) by Rene Martin Dudin. Jeff provided the group with packets that included organized copies of the manuals, along with some of his own notes. Samples of period bindings were inspected and discussed

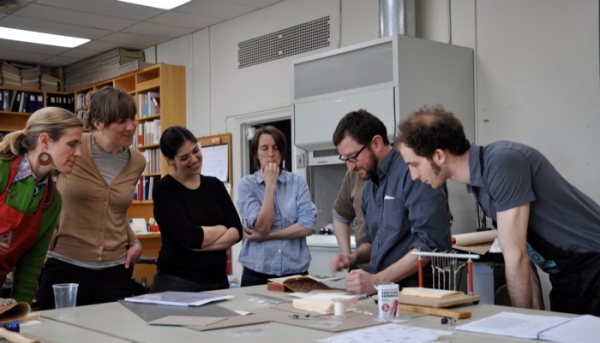
FIGURE ONE. Examining the 18th c. artifacts
and Jeff characterized the bookbinding industry of the time. We learned that in 1776, 75% of the bookbinders in Paris were located on just one block within the University community. Bookbinders and printers at that time were associated with guilds that regulated the trade, so they were no doubt a tight-knit and highly regulated community. Jeff underscored that this pre-industrial era period was the end of the hand-bound book era, and how fortunate we are to have two manuals documenting how the work was performed in France at this time.
The manuals had to be taken in context, however. Dudin’s book was not written for contemporary or would-be bookbinders but rather for the book-buying public, to educate readers on the details of a properly bound book so they could avoid being cheated by an unscrupulous bookbinder. That said, Dudin’s wasn’t just a casual survey of “what to look for” in a bound book. Jeff notes in our course packet that Dudin devotes “12 (!) pages and 7 plates” to folding, and that, even if Dudin exaggerated, the extent of paper beating that occurred in this period appears to have been, according to current bookbinding sensibilities, rather extreme:
“…judging from these descriptions…they were beating these books a lot; beating the sheets before folding, pressing after folding, beating after pressing, and pressing a second time … The boards are beaten before they are attached, and after covering. And as a final step, before returning the book to its owner, Dudin has us beat the four inside corners!”
With this in mind, we folded the paper into sections and wielded hammers, proceeding to pound paper and raise such a racket that other workers in the serene house of research were drawn follow the noise to find its source, and to inquire whether we had any aspirin. We beat until we were sore and could no longer pick up a hammer.

FIGURE TWO: Beating.

FIGURE THREE: More Beating.
Alas, in the end, we concluded that our best efforts still would not have satisfied Dudin!
But we were there to make books, not to pulverize paper, so we had to move on. Lovely 18th c. marbled paper made by Iris Nevins was employed for the endsheets. Kerfs were sawn into the spine and our textblocks were sewn on cords.

FIGURE FOUR: Sewing on cords.
Various sewing frames and a variety of sewing keys were experimented with, including Jeff’s small/collapsible travel sewing frame. While not mentioned in Dudin or Gauffecort, some even went for the ultimate simplicity of using nails as sewing keys, as documented in several later bookbinding manuals.

FIGURE FIVE: Nail as a sewing key.
Pretty neat trick, that! Once the books were sewn, the cord laces were frayed and pasted, and the boards were prepared (again with the beating!) and laced on. Textblocks and board edges were then ploughed in-boards, using a prototype Peachey custom travel-sized plough.

FIGURE SIX: Jeff working up a sweat speed-ploughing.
Our super smooth textblock edges were then colored (red, of course), paneling (aka, adhering paper or parchment transverse spine linings) was performed, and endbands were sewn on.

FIGURE SEVEN: Sewing endbands
The time had finally arrived for covering our books. Vegetable-tanned calf skin prepared by Richard E. Meyer & Sons was on hand for the task. But first, we were treated to a mini Peachey workshop on knives, spokeshaves, and knife honing, the completion of which found my knife was sharper than it’s ever been! For resharpening a knife, Jeff recommends pressure sensitive adhesive backed 3M microfinishing film mounted on a very smooth surface such as glass or marble, or—even better—strips of aluminum, the surface which was first hand lapped smooth. Jeff’s set was super light and travel friendly and worked really well—just add water and hone.

FIGURE EIGHT: Knife honing station, complete with bacon band-aids
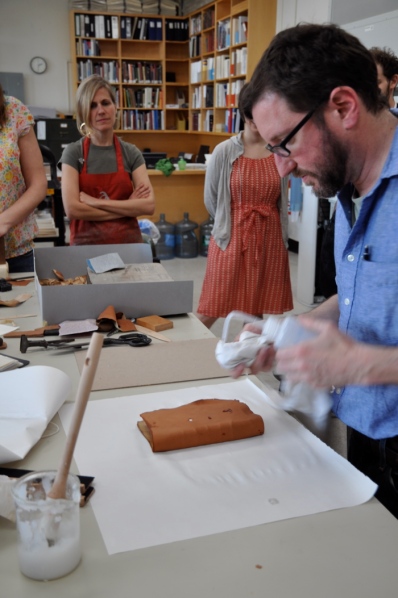
To maintain his sharp edges, Jeff uses a strop made of horsebutt laminated to calf skin, both flesh side out. The first stroping is on the horsebutt, which contains a .5 micron green honing compound, followed by a final polish on the naked calf skin. Jeff then demoed paring and covering-in (particularly impressing the group with his trick of paring all four edges of the leather in one swoop of the knife).

FIGURE NINE: Jeff demonstrating leather covering
We then followed suit and tied up our books to dry a bit. They were then finished off with speckling (we passed on the traditional chemicals, instead opting for Golden Fluid Acrylics) followed by a couple of blind lines on the boards and spine. At the end of the four-day session, our group was very satisfied with the results of our labor! Thanks Jeff!
(Thanks back at you, Liz!)
There is another review of this workshop by Brenna Campbell on the NY Chapter of the Guild of Bookworkers website.

can you tell me where to buy animal ground glue it is glue that smelled terrible open for about 15, 20 minutes but worked great for me? i can send pictures of my bookbinding?
thanks
clar
Granular hide glue at several bloom strengths can be purchased from:
https://www.toolsforworkingwood.com/store/item/MS-HIDEGL.XX
Regards,
Jeff